 Hungarian (hu)
 English (en)
 German (de)
 Romanian (ro)
 Slovak (sk)
 Ukrainian (ua)
 Polish (pl)
 Netherlands (nl)
 Czech (cz)
 Bulgarian (bg)
 Indonesian (ie)
 French (fr)
 Spanish (es)
 Turkish (tr)
 Swedish (sv)
 Finnish (fi)
 Chinese (Simplified) (cn)
 Danish (dk)
 Estonian (et)
 Greek (el)
 Italian (it)
 Japanese (ja)
 Latvian (lv)
 Lithuanian (lt)
 Norwegian (Bokmål) (nb)
 Portuguese (pt)
 Russian (ru)
 Slovenian (sl)
 Korean (ko)
 Arabic (ar)
In the Contract Manager menu, select “Manage Templates” to open the Template Manager list page.
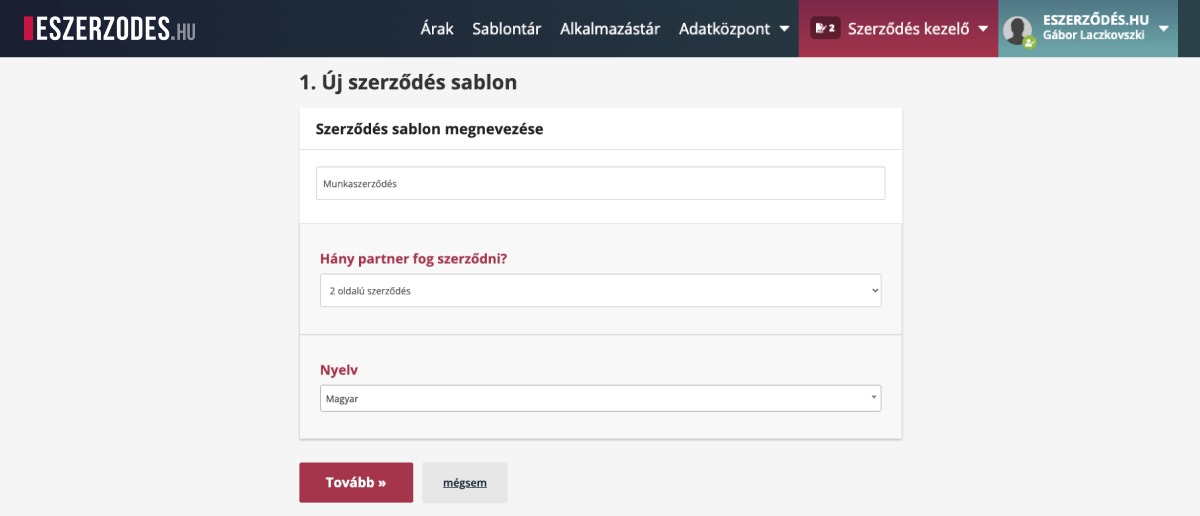
Give your template a name, then select how many signers will finalize the contract from the dropdown menu, and set the document language.

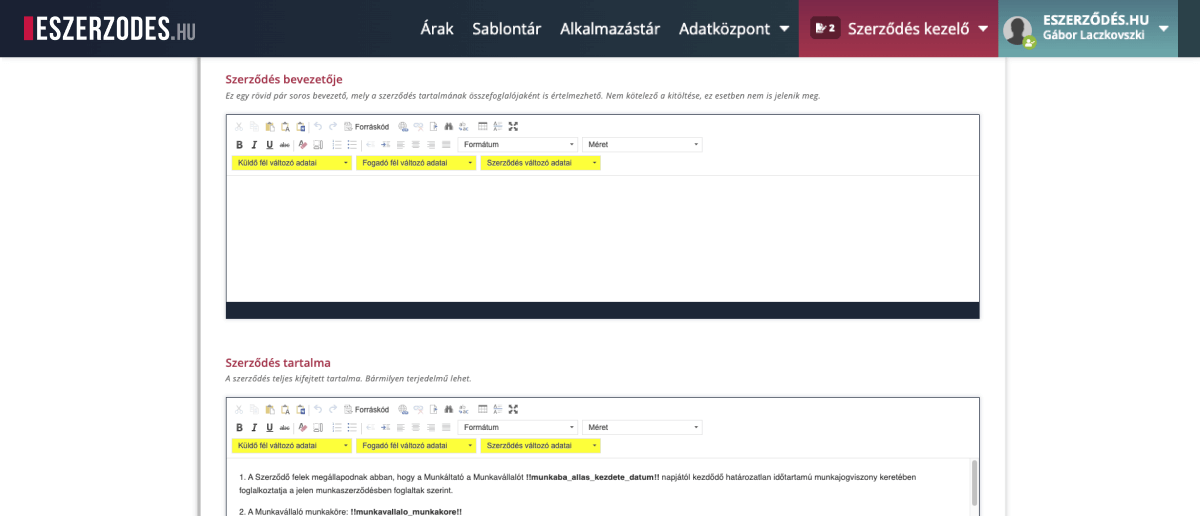
Name the sender and recipient parties. For example, in an employment contract, “Employer” and “Employee,” so these labels clearly refer to the document’s signers.
Contract Introduction Write a brief 2–3 sentence summary introducing the contract’s purpose and main points. This is optional — if left empty, it won’t appear in the document. Contract Content This is where you place the full text of the agreement — from a few paragraphs to several pages depending on the contract. Write freely to ensure all terms and conditions are included.
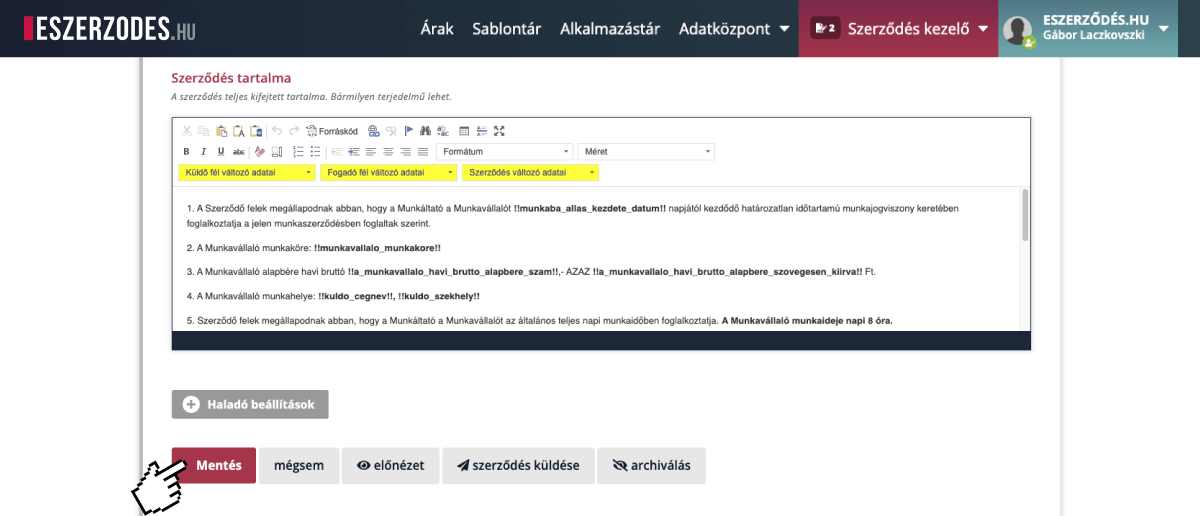
After making edits, remember to save the document regularly to prevent losing any changes.
The variable fields appear above the contract text by default and make each generated contract unique (for example, “Job Title” or “Base Salary” in an employment contract). These fields must be filled out by the creator or one of the parties before signing, ensuring no critical information is left blank.

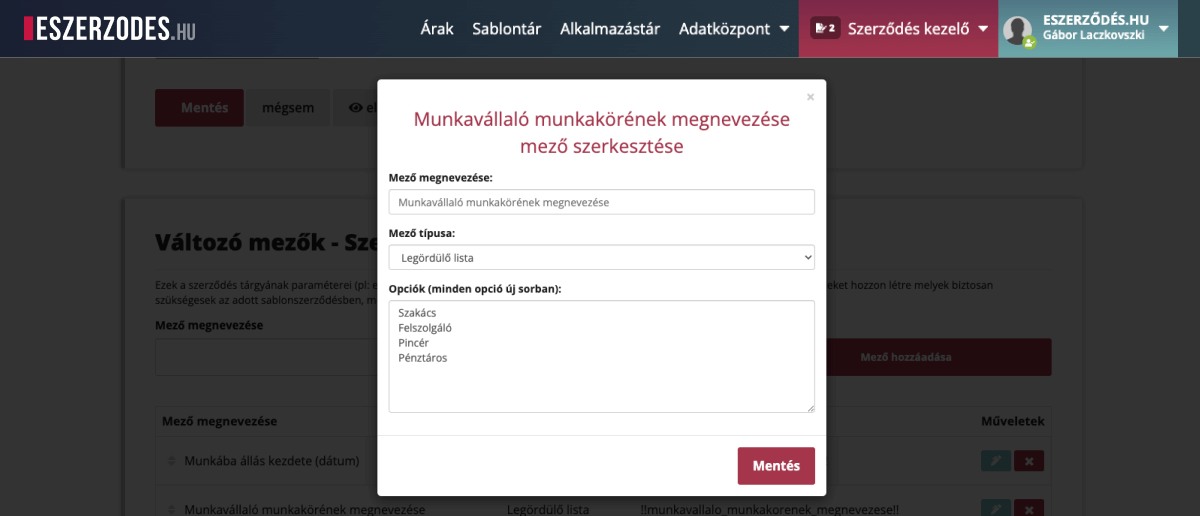
Give each field a clear and descriptive name (e.g., “Start Date of Employment,” “Place of Work”). Select the appropriate data type (single-line text, dropdown, image attachment, etc.) so the system validates input correctly. Fields marked as “Recipient Editable” can only be filled out by the receiving party, eliminating the need for additional data collection — speeding up the process and ensuring accuracy.
You can freely insert variable field codes into your text; the system will automatically replace them with the entered values during contract generation. Use the yellow dropdown menu to select the desired field and insert it at the cursor position with a single click. This saves time and avoids manual entry errors.
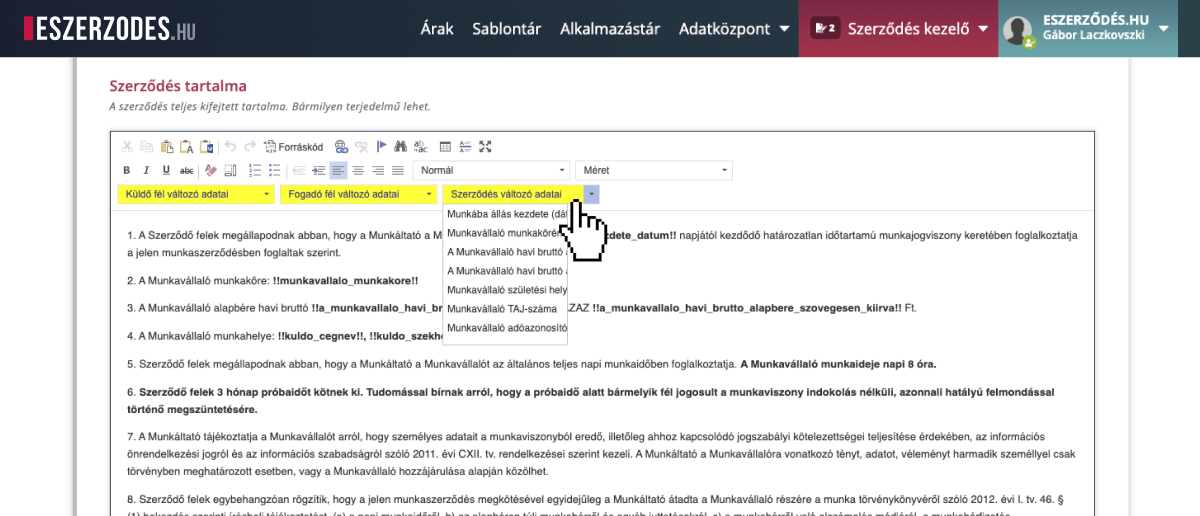
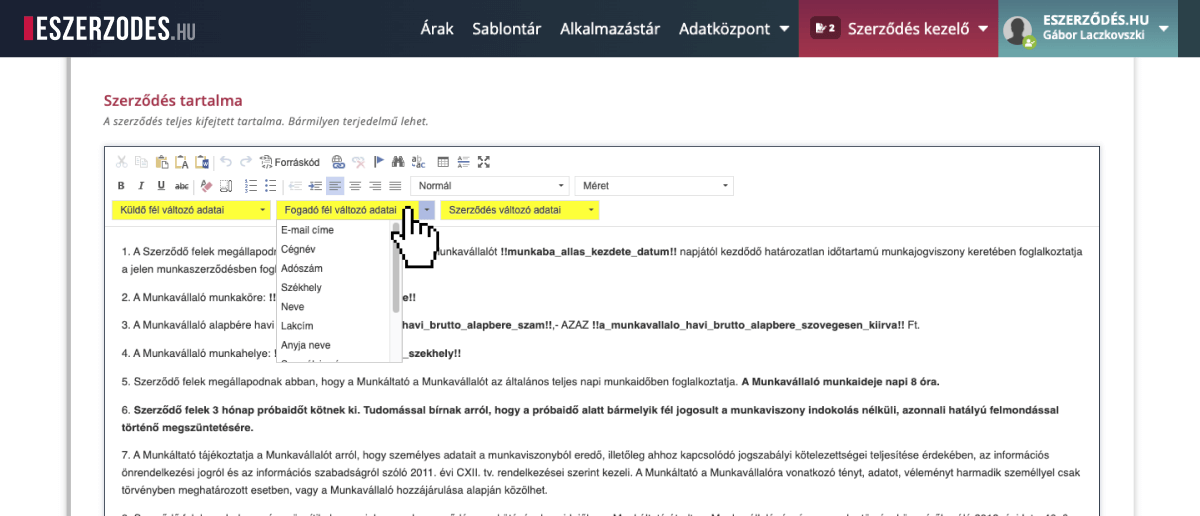
The system automatically manages basic sender and recipient data such as company name and tax number, so you don’t need to create these separately. Simply select the appropriate variable field, and the system will handle the accurate automatic filling.
By expanding the Advanced Settings section, you can choose from the following options: Hide automatic introduction section Hides the formal introduction (“Made between the parties…”). When used, it’s recommended to manually write your own introduction.
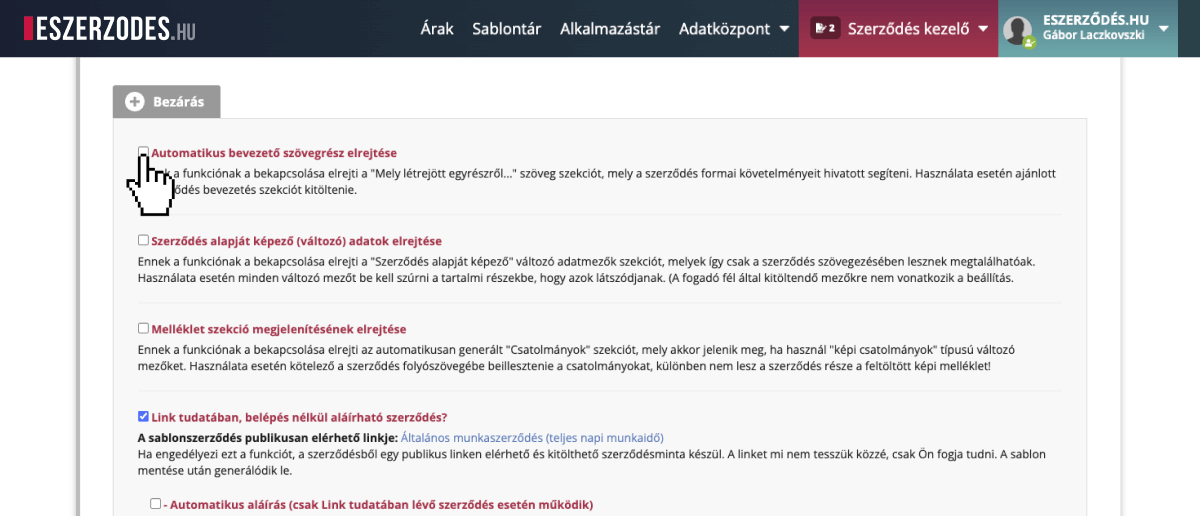

Hide variable data section Hides the predefined variable field section so only the inserted codes appear — in this case, all variables must be manually placed in the content.
Hide attachments section Hides the “Attachments” block when image attachments are used; images must then be inserted directly into the contract text.
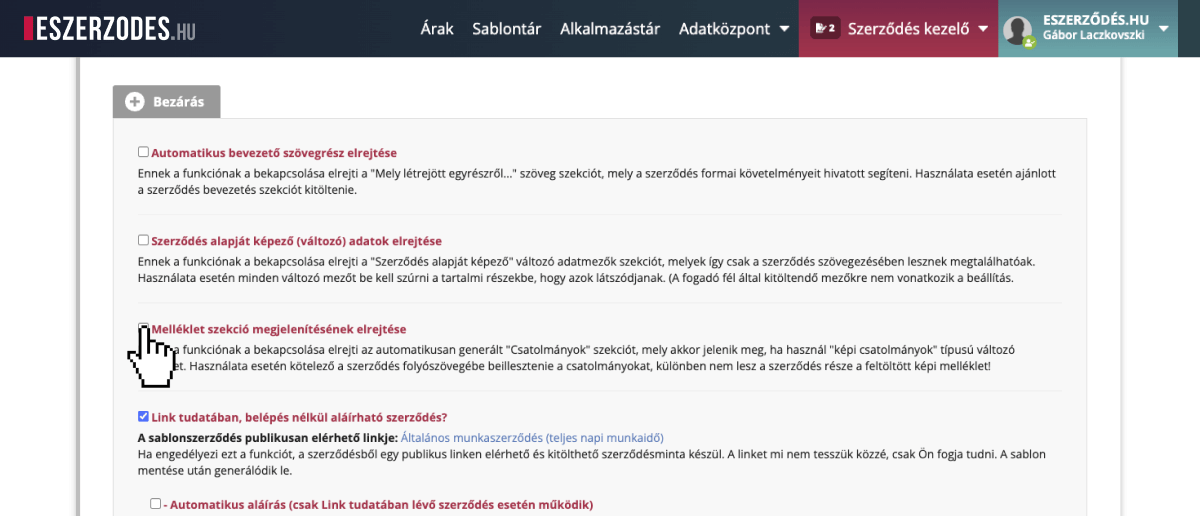
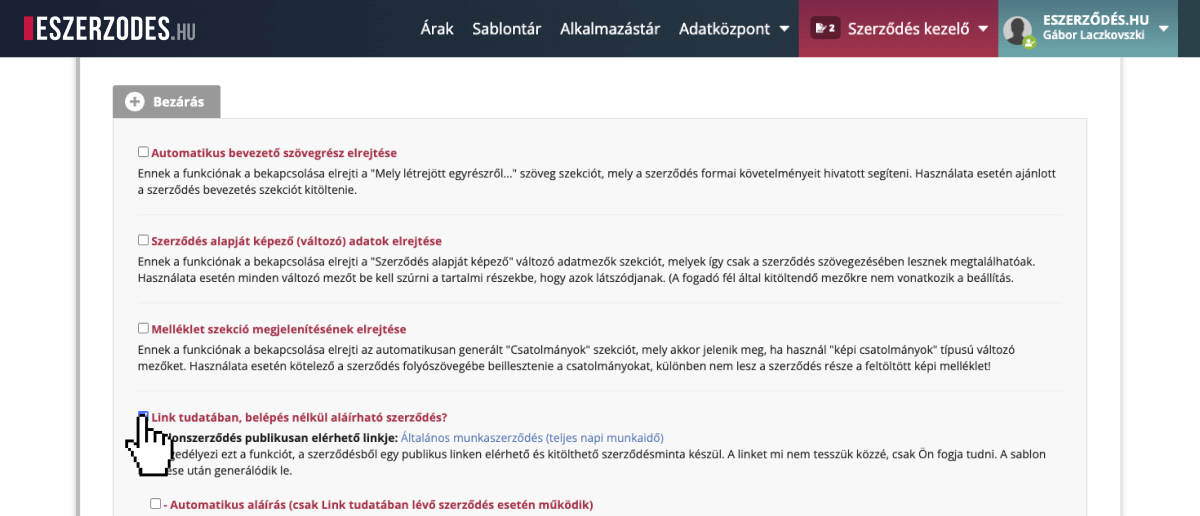
Signable via public link without login Generates a public link for the template, allowing the document to be filled and signed without logging in.
Password protection Adds a random password to the generated PDF, increasing security and preventing unauthorized access.
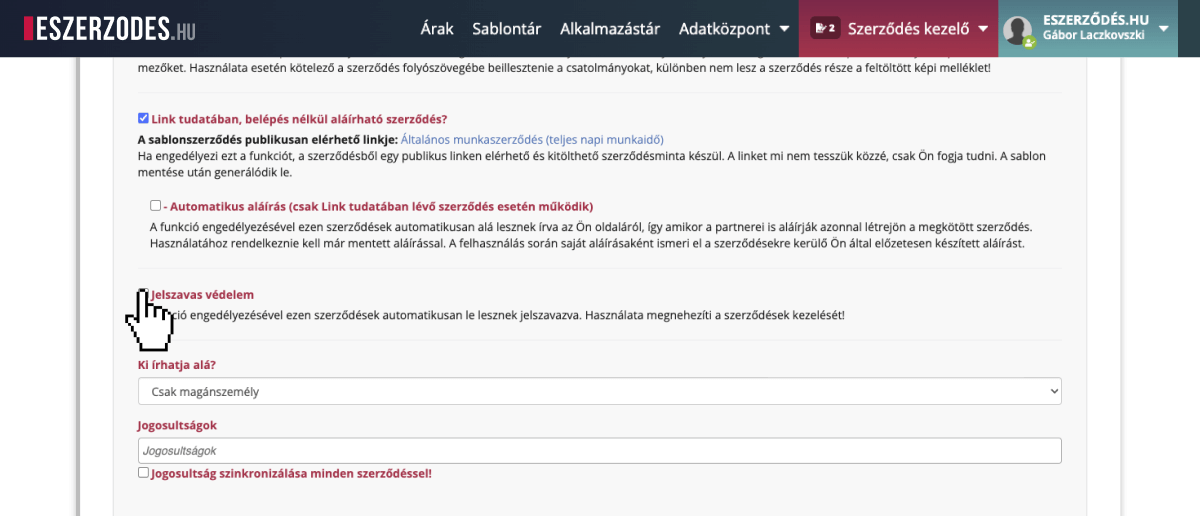
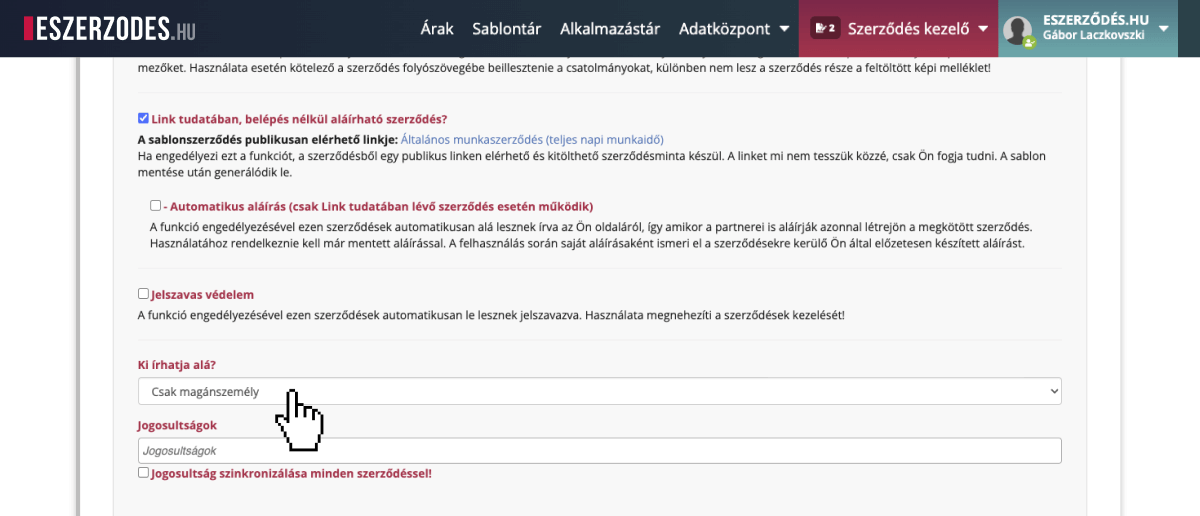
Who can sign? Restricts signing to individuals or companies only, preventing incorrect submissions.